


Floating Dry Erase Spider Experiment: Make Drawings Swim
Picture a dish of water with little black spiders skating across the surface, legs wiggling as the water moves. Your kids drew every one of them, and none of them are real. This is the floating dry erase spider experiment, and it’s one of the easiest ways to bring a bit of spooky science into your home this Halloween 2026.
All you need is a spoon, a dry erase marker, and some tap water. The setup takes about two minutes, and the “wow” moment comes almost instantly. It works well for kids with a grown-up’s help, and it’s simple enough for school-age kids to run on their own.
In this guide, you’ll learn:
- Why dry erase ink floats (in kid-friendly terms)
- Exactly what supplies to gather and the five steps to follow
- How to fix common problems so your spiders lift off on the first try
Let’s get those spiders swimming.
Why This Halloween Experiment Is Worth Trying
Halloween crafts often mean glitter, glue, and a long cleanup. This activity is different. It uses items you likely already have, and cleanup is as simple as wiping a spoon and pouring out some water.
It also gives kids a real science lesson without feeling like homework. They make a guess, test it, and adjust when something doesn’t work. That’s the scientific method in action, dressed up in a Halloween costume.
And there’s room to explore. Once kids master spiders, they can try bats, ghosts, pumpkins, or anything else they can dream up.
The Science Behind Floating Dry Erase Spiders
Before you start, it helps to know why this trick works. Kids love asking “how?”, so here’s an answer you can share.
Dry Erase Ink Is Made to Be Slippery
Permanent markers contain an acrylic polymer, which is a substance that makes ink grip tightly to a surface. That’s why permanent marker is so hard to remove.
Dry erase markers work the opposite way. Their ink contains an oily silicone polymer that keeps it from sticking. That slippery quality is what lets you wipe a whiteboard clean with a simple swipe. It also means dry erase ink won’t cling to smooth surfaces like a metal spoon.
Water Slides Underneath the Drawing
Dry erase ink doesn’t dissolve in water. So when you dip a spoon with a dry erase drawing into a dish, the water slips under the ink and lifts it away from the spoon in one piece.
The Ink Is Lighter Than Water
Once the drawing lifts off, it stays on top because the ink is less dense than water. That’s why your spiders float instead of sinking.
A simple way to explain it to kids: “The marker ink is slippery, so it can’t hold on to the spoon. Water sneaks underneath, and because the ink is lighter than water, it floats on top like a tiny boat.”
Materials You’ll Need
Gather these supplies before you begin:
- A metal spoon (a regular tablespoon works great)
- A black dry erase marker
- A shallow dish (a casserole dish, pie plate, or baking pan is perfect)
- Tap water
- Paper and a pencil (optional, for “catching” spiders)

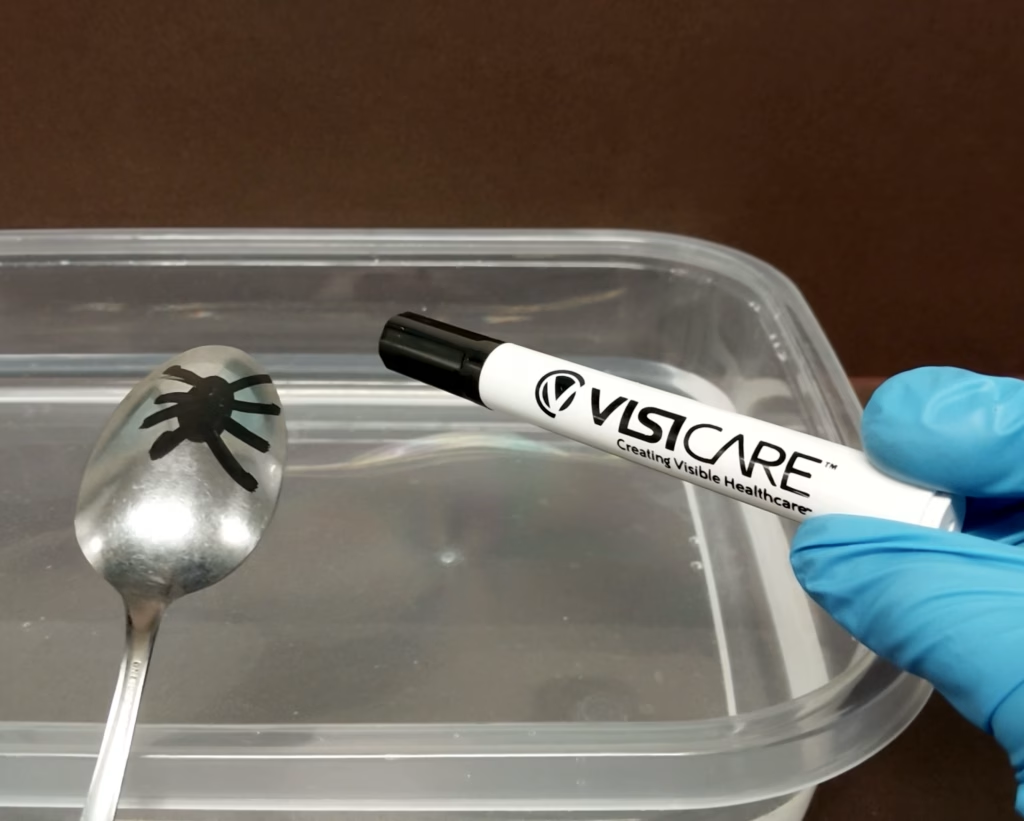
A quick note on markers: This experiment works best with a fresh, juicy dry erase marker. Older markers that have started to dry out may not release ink cleanly. We used VisiCare™ Dry Erase Markers on hand for our spiders, and a new black marker gave us bold, solid lines that lifted off nicely.
Safety tip: Keep a grown-up nearby, especially with younger kids. Remind little ones that the water is for experimenting, not drinking, and wash the spoon before it goes back in the kitchen drawer.
How to Make Floating Dry Erase Spiders (Step-by-Step)
Now for the fun part. Follow these five steps, and expect a little trial and error the first time. That’s part of the experiment.
Step 1: Draw a Spider on the Back of a Spoon
Turn your spoon over so the rounded side faces up. Use your dry erase marker to draw a small spider on it.
A few tips for success:
- Make your lines thick. Thin, wispy lines tend to break apart in the water.
- Connect every leg to the body. Any gaps can cause legs to float away on their own.
- Keep it simple. A round body with eight sturdy legs works better than lots of tiny details.
For younger kids, an adult can draw the body while the child adds the legs. It’s a nice way to share the activity.
Step 2: Let the Ink Dry for 10–30 Seconds
This step is where patience pays off. The ink needs to dry just a little, but not too much.
If you dip it too soon, the wet ink may smear. If you wait too long, it may stick to the spoon. Start by counting to about 15 or 20, then move to the next step.
Drying times can vary based on the marker and how fresh it is. Treat your first spider as a test run, and adjust from there.
Step 3: Gently Place the Spoon in the Water at an Angle
Fill your shallow dish with an inch or two of tap water. Hold the spoon at a slight angle and slowly lower it into the water, drawing side up.
Watch closely. You should see the spider’s legs start to peel away from the spoon. When that happens:
- Gently tilt and rotate the spoon to help the rest of the spider lift off.
- Move slowly. Quick motions can tear the drawing.
- Pull the spoon out once the spider is free. If you leave it in, the spider may drift back and stick to it again.
If nothing happens, try a different angle. Still no luck? Wipe the spoon dry, draw a new spider, and change your drying time. (More tips in the troubleshooting section below.)
Step 4: Repeat to Add More Spiders
Once you’ve freed your first spider, do it again. Use the same dish and keep adding spiders until you have a whole creepy crew.
The more spiders you add, the more impressive the dish looks. Kids can also try gently blowing on the water to make the spiders “crawl” across the surface.
Step 5: Catch the Spiders with Paper (Optional)
This bonus step is a favorite with many kids. Cut regular white printer paper into small squares. For extra Halloween flair, use a pencil to draw a spiderweb on each square.
Next, lay a paper square gently on top of a floating spider, then lift it up. The spider will stick to the paper, as if it’s been caught in its web.
This trick also comes in handy for cleanup. If any spiders break apart, use paper to scoop up the pieces and clear the dish.
Troubleshooting: What to Do If Your Spiders Won’t Float
Don’t worry if your first attempt doesn’t go as planned. This experiment can take a few tries to get right. Here are the most common issues and how to fix them.
Your Marker Is Too Dry
Older markers often don’t lay down enough ink for the drawing to lift as one piece. If your lines look faded or streaky, switch to a newer marker. A fresh marker is often the single biggest fix.
The Ink Is Too Dry or Not Dry Enough
If the spider smears, the ink was too wet. Wait a bit longer before dipping next time. If the spider stays stuck to the spoon, the ink dried too long. Try dipping sooner.
Keep track of your timing. For example, if 30 seconds didn’t work, try 15. If 10 seconds smeared, try 20.
The Spider Breaks Apart
This usually means the lines were too thin or the legs weren’t fully connected to the body. Redraw with bolder strokes and make sure every leg touches the body.
The Spider Lifts but Sticks Back to the Spoon
Remove the spoon from the water as soon as the spider floats free. Lingering gives it a chance to latch back on.
More Ways to Play
Once your kids get the hang of floating spiders, keep the fun going with a few variations:
- Draw other Halloween shapes: Bats, ghosts, jack-o’-lanterns, and stick-figure skeletons all work well.
- Use different colors: Colored dry erase markers can turn your dish into a rainbow of floating creatures.
- Make it a challenge: See who can float the largest spider without it breaking apart.
- Try a science journal: Older kids can record drying times and results to find their “perfect” number.
These small twists keep the activity fresh and encourage kids to test new ideas on their own.
Easy Cleanup
One of the best parts of this experiment is how little mess it makes. When you’re finished:
- Catch any floating drawings with paper or a paper towel.
- Pour the water down the sink.
- Wipe the spoon and dish with a dry cloth, then wash them as usual.
- Cap your markers tightly so they stay fresh for next time.
That last step matters. A tightly capped marker stays ready for your next round of floating spiders, or for drawing on the whiteboard at home.
Summary: Your Floating Spider Game Plan
Here’s a quick recap to keep on hand:
- The science: Dry erase ink is slippery, doesn’t dissolve, and is lighter than water, so it floats.
- The supplies: A spoon, a fresh black dry erase marker, a shallow dish, water, and optional paper.
- The steps: Draw, dry 10–30 seconds, dip at an angle, repeat, and catch.
- The fix: If it doesn’t work, try a newer marker or adjust your drying time.
Bring Some Spooky Science to Your Halloween
The floating dry erase spider experiment turns a few household items into a memorable Halloween moment. It’s quick, low-mess, and full of small surprises that keep kids curious. Plus, every attempt teaches a little about how materials behave.
Grab a spoon, uncap a fresh marker, and give it a try this week. Bookmark this guide so you can return to the troubleshooting tips whenever you need them, and enjoy watching your little scientists bring their spiders to life.
Happy Halloween 2026!